Saturday, May 21, 2011


Well, I was finally able to finish removing that #$!&@ passenger side floorboard! THAT is something I never want to have to go through again! Maybe tomorrow I'll get an hour or so to grind the flanges down smooth to get it ready for the new floorboard. Also got the pedals / pedal box / master cylinders out along with the steering column.

Thursday, April 28, 2011

still stripping paint

All I've been able to do lately is strip more paint off a little at a time. I've almost got it off the outside, just a little more on the rear quarters and around the back hatch. Then I can start on the jambs and interior. I really don't think I'll need to strip the inside, just sand and prep for new paint. The inside has never been painted like the outside has so it's still the factory paint there. Progress is slow but fairly steady, Summertime is full of other activities, so I never know what kind of free time I'll have to work on the car. You never know when a fishing trip or something else will pop up!

Saturday, April 16, 2011

more stripping of the shell

Today I got a little more done towards getting the shell ready for paint. I got the cowl panel stripped, some of the roof, the pass side a and c pillars. I also stripped the drivers door and some of the drivers side quarter. I tried a aerosol stripper called "peeler". It worked really good, stripped the paint but left the factory primer. Considering the expense, I think I'll just use it on areas such as pillars and places where the heat gun and scraper would be too difficult.


I also removed the windshield and back hatch glass. I can see where the finishers that go in the rubber weatherstrips would be difficult to install. I actually had to cut the old dried, hardened rubber away from the finishers or risk damaging them just to get them out.

Sunday, April 10, 2011

floorboard replacement


This is one project that I was dreading and after getting started on it, now I really know that it is as bad as some have said. Hard, dirty, nasty work. I do know that whoever spotwelded the floorpan in this car in Abington back in 1974 really knew what he was doing. It too me two hours or better just to get this far. I'm really glad the drivers side floor is in great shape and I've just got the one to do. I'm looking at getting a spot weld cutting bit. The grinder, hammer and chisel are way too much work, but the job IS getting done.... however slow it may be.

Saturday, April 9, 2011

stripping paint..


I started stripping paint from the car this past weekend. No real surprises found, very minimal filler under the paint. The most I found so far was in the very front of the pass side wing. It's mostly good straight sheet metal. After stripping both fenders and the hood, I sprayed it all with self-etching primer.


The next step will be to fill in any small dents or low spots before going over it with high fill primer and then the block sanding will commence! The larger dents will get hammered out, hopefully. This body work is fairly new to me. I did all the body work and painting on the roadster, and it shows now just how much I still have to learn. This one WILL be better, maybe not perfect, but better.

Saturday, April 2, 2011

more stripping down...

Well, it's been awhile since I've been able to lay hands on the GT. Got out for a few hours today and finished stripping the interior, removed all exterior chrome and glass except for the windshield and hatch glass.


Removed all the door hardware, regulators, handles, latches, etc... The dash came out easier than I thought it would. Now to start getting that rusted passenger floorboard out.

Tuesday, March 15, 2011

Gathering parts / pieces...


Got several important pieces to the rebuild this week. Finally found a Rover flywheel for a manual trans on eBay. I never thought a flywheel would be so hard to source. Found plenty for sale for big $$, just wasn't part of the budget.


Received the pass side Heritage floorpan and radiator support pieces today. Looks to be some welding in my near future. Also have a Heritage hood latch panel I found on eBay a couple of weeks ago. I just need to find a rubber bumper donor car that I can cut the front half of the pass side inner fender from to repair the damaged piece on the GT. Once that is done, the real work will begin to get the tub ready for paint prep.


Also got a heat gun to see if that will be a viable means of paint removal. I remember removing paint from the roadster years ago. It was a long, dirty process with a razor blade and sandpaper. There has got to be an easier way.

Hopefully this weekend I'll be able to test the O/D to see if it is operational or not. It may prove to be easier to bench test it instead of trying to get the car drivable. I'll be looking into the procedure before going too far with the disassembly of the car. With luck, I'll have more to post after the weekend.

Sunday, February 27, 2011

Not much done today...

Went out for an hour or so today and finished removing the remainder of the interior panels and headlining trim along with the interior mirror and visors. Also removed the brightwork around the passenger side windows. I may not be able to get much else done for the next week or two with Mardi Gras coming up, we'll be out of town next weekend.

Saturday, February 26, 2011

And now it will stop.... I hope

Spent part of the day today going through the brakes. The master cylinder was empty when I got it home, so it had no brakes other than the parking brake. I filled the master cylinder after cleaning out the reservoir. I took the lines loose from the calipers and wheel cylinders and let them gravity bleed till the fluid was clear. While that was happening, I removed the calipers and used a c-clamp the push the pistons in and out several times to get them freed up. Taking the wheel cylinders off the rear and freeing them up was a bit more work than I wanted, but I felt better after it was done. Eventually everything will get rebuilt with new seals, etc.., but for now I just wanted to be able to stop the car without using the parking brake. After all that was done, I had a good, firm pedal with no leaks! After seeing that nothing was leaking, I had to wonder why the m/c was empty in the first place. I'll just have to keep an eye on everything for awhile. Then I went after the clutch hydraulics. The slave cylinder bleeder screw was stopped up with something, but after pumping the pedal several times it blew whatever it was out and then the fluid was able to flow. Without anyone else around, I wasn't able to bleed it good enough to get a good pedal.
Next up is the cooling system, need to get a top hose without a huge hole in it so I can run the engine long enough to adjust the timing and carbs. I'm trying to get the thing in good enough shape to at least go around the block and see what I've got before putting the engine and O/D trans up for sale. Once I can get it to that point, I can really start to take it apart.

Tuesday, February 15, 2011

Got the engine running

Today I was able to get fire to the plugs after replacing the points/condenser in the dizzy. filled the radiator, changed the oil and filter, hooked up a fuel supply to the carbs (after removing them and cleaning the float bowls) and when I turned the key..... It fired up after 2-3 seconds!! Settled in to a good idle, had good oil pressure and overall sounded pretty good. Just needs a little tuning and adjusting. Now I know I've got a running engine to sell. Now to check the O/D trans to see that it works.

Sunday, February 6, 2011

At home, starting the process of disassembly....

Once home, I started cleaning it up a little more and started taking it apart, getting it ready for the body work that was needed before paint work could begin. Took the seats and carpet out to get a look at the floorboards and sills. Everything was in better shape than I imagined with the exception of the pass side floorboard which I knew had to be replaced.
drivers side floorboard

pass side floorboard with rust holes

rust in floor
drivers floor

Getting it cleaned up and home...

January 22nd I went with trailer in tow to pick up the car and bring it home. We dragged it out of the shed and onto the trailer. With everything secured, I headed home.


I took it by to give it a good cleaning on the outside. It cleaned up pretty good!


 All stock under the hood.....

First look

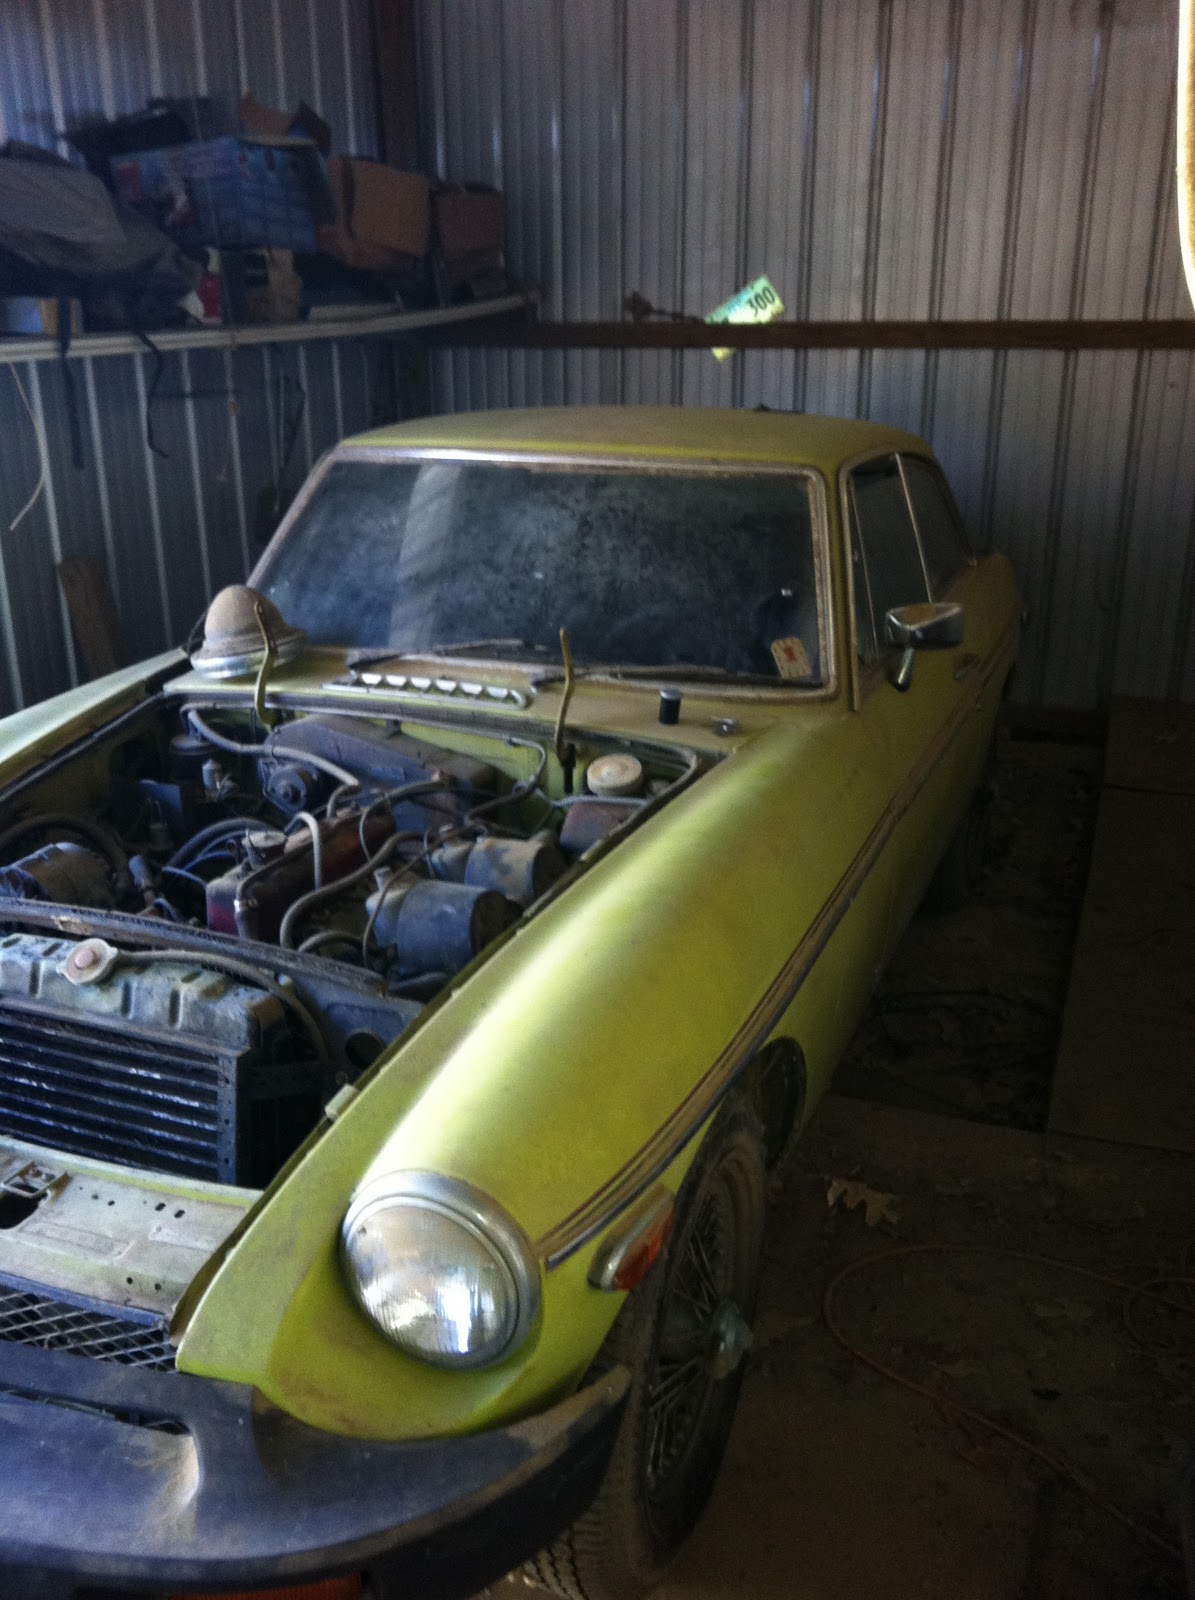
January 15th, 2011 was the day I first saw the car, It was dusty, in an old shed where it had apparently sat since 1995. Overall it was in really good shape, the only rust was on the passenger side floorboard. The pass side front wing and hood had been damaged when a limb fell across it and the PO had obtained a replacement hood and had the wing straightened. The inner wing was still bent as was the latch slam panel. But everything was there and all original. I made a deal with the owner and plans were made to come pick it up the next weekend.   


After crawling around, over and under the car, a couple good things came to light.... the car was equipped with a/c AND overdrive transmission!


    Finding out that there were only 1251 BGT's imported to the US as 74.5 year models with rubber bumpers was a unexpected surprise.
   The plans are to install a 3.9L all aluminum Rover fuel injected V-8 that I was going to put in my 74 roadster. I will change the color of the car and swap out the wires for alloy wheels, but the body will stay pretty much stock.